Bones
by Marie Gross
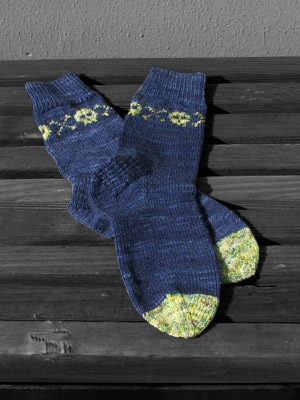
Not to jump on the pirate bandwagon, but who can resist a pair of skull-and-crossbone socks? Especially ones made out of that most luxurious of sock yarns, Koigu. This is a small project, so splurging on nice yarn isn't too painful on your wallet, and if you have a friend who will share the contrasting yarn with you, it's even more affordable. Skinflints and naysayers be damned!
Mood Enhancers
Yellowbeard (1983, rated PG)
Skills Used
Basic knitting
Knitting in the round
Picking up stitches
Two-color knitting
Using a chart
Finished Size
Fits adult size woman's foot, size 9-11 sock size.
Materials and Tools
2 skeins of Koigu KPPPM, Navy Blue #2170
1 skein of Koigu KPPPM , Green # P516219)
Four US#1/2.25mm double point needles
Stitch marker
Tapestry needle for weaving in ends
Download
Skull and Crossbones Chart (PDF file; 16k)
Gauge
8 sts per inch/2.5cm
Instructions
Cuff
With main color cast on 60 stitches. Divide evenly between 3 needles (20 stitches per needle). Place marker on end of needle where cast on begins to mark the beginning of the round. Join in round, being careful not to twist. Knit 1 x 1 ribbing (knit 1, purl 1) for 2 inches. Then continue in stockinette stitch for 8 rounds.
Chart
At beginning of the 9th round, follow chart going from right to left. The chart is marked for the main color (MC) and contrasting color (CC). As your working, hold the MC in one hand and the CC in the other. Be sure to keep floats on the wrong side loose, but not too loose.
To avoid long floats on the wrong side, the pattern includes points for you to twist he yarns if the color area is five or more stitches. To twist the yarns, simply knit to the block on the chart with an X on it. The X designates the point at which to twist. After knitting that stitch, twist the yarns clockwise in the back by simply crossing the strand of one skein over the other twice. Be careful not to tangle your skeins. This will make a shorter float for the yarn not being used in that particular color sequence.
After completing the chart, continue in stockinette stitch for another 3 inches.
Heel flap
Now rearrange the stitches on your needles so that the first needle (Needle A) has 30 stitches, and the other needles (B & C) have 15 stitches each on them (see diagram).
You will now be working only on Needle A for the flap. Over the 30 sts, do the following:
Row 1: *Sl 1, K 1*, repeat between ** across the row. Turn.
Row 2: Sl 1, P across.
Repeat these two rows until you have 16 slip stitches on each side.
Turn Heel
Row 1: Sl 1, K 15, SSK, K1, turn.
Row 2: Sl 1, P 5, P 2tog, P 1, turn.
Row 3: Sl 1, K 6 (you should be at the stitch before the gap), SSK, K1, turn.
Row 4, Sl 1, P to the stitch before gap, P 2tog, P 1, turn.
Continue in this manner, always slipping the first stitch and either knitting or purling until the stitch before the gap in the row, at which youll either SSK, K1 (if on a knit row) or P 2tog if on a purl row. Your last row should be a purl row where youll P 2tog at the end of the row. On the next knit row, you should have 18 stitches. Knit across row.
Gusset
Pick up 16 sts along side of heel flap and add them to Needle A.
Knit instep sts on Needles B & C and combine them on one Needle. This will now be Needle B.
Pick up 16 stitches along side of the heel flap and knit 9 stitches from Needle A. This will be Needle C.
Needles A and C should have 25 sts each. Needle B should have 30 (80 sts total).
Decreasing
Round 1: K to last 3 sts on Needle A. K2tog, K1. Knit across sts on Needle B. At beginning of Needle C, K1, SSK, K remaining sts.
Round 2: Knit.
Repeat these 2 rows until 15 sts are left on Needles B & C (total of 60 sts).
Work in stockinette stitch for another 5 inches or until sock measures 1 ½" less than total desired length.
Toe Shaping
If using the CC to make the toe, knit the first three stitches in Round 1 with both strands of the MC and CC held together. After the third stitch, drop the MC strand and continue knitting with only the CC yarn. This will prevent a hole or space from forming where you join the contrasting color yarn.
Round 1: Needle A - K to last 3 sts, K2tog, K 1; Needle B - K1, SSK , K to last 3 sts, K2tog, K 1; Needle C - K1, SSK, K remaining sts.
Round 2: Knit.
Work rounds 1 and 2 until 30 stitches remain. Then repeat Round 1 until 8 stitches remain. With your tapestry needle, pull yarn through remaining 8 stitches and secure to wrong side.
Now take a look at your boney masterpiece! You may want to gently stretch the sock lengthwise where the motif appears if the stitches need to be more visible. Block and wear to show off your drop dead gorgeous new socks!
About
Marie is an attorney in Chicago, Illinois who would bring her knitting to court with her if it werent for those damn x-ray machines and bailiffs who disapprove of needles and yarn. She lives in the suburbs with her precocious cat Snagglepuss and, although she has made several pairs of socks previously, Bones is Maries first design. She feeds her knitting addiction by also working part-time at Mosaic Yarn Studio in Des Plaines, Illinois.