

 |
 |
 |
 |
 |
 |
 |
 |
click image to enlarge
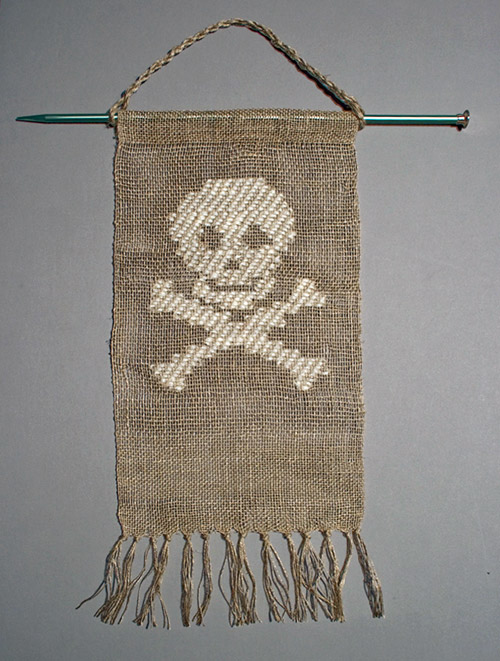
My home office is located in the central part of my house. This is great when everyone is away. I can juggle writing, checking email, cooking, laundry, and the ever important getting another cup of tea, all from my home base. The trouble comes when the people I live with are home. Its hard for them to tell when Im deep in the throes of the muse verses playing online Scrabble®. So I created this woven flag as a visual clue as to whether now would be a good time to approach me. Its woven as a transparency, so it glows and looks especially menacing when my monitor is on. The knitting-needle hanger (optional) can be used to enforce the message, when necessary.
Suggested Reading
The Pirate Primer: Mastering the Language of Swashbucklers & Rogues
by George Choundas
Difficulty
Boy Scout Dropout
Click here for definitions of difficulty levels.
Finished Measurements
7.5/19cm x 14/35.5cm (excluding fringe and hanger)
Download
Arghh Skull Outline (pdf format)
Materials
- A two-shaft or rigid-heddle loom (for the plain-weave version) or a four-shaft loom (for the twill version.)
- 12-dent reed or heddle
- Scissors
- Tapestry needle
- Two strands of Paternayan 100% wool crewel embroidery yarn (or two strands of lace-weight knitting yarn) in white to use as pattern weft
- 20/2 linen yarn in natural, to use as warp and background weft
- Shuttle for linen weft
- Tapestry bobbins for the wool weft (optional; you can also just wind the wool into yarn butterflies)
- Spare knitting needle or 14" dowel rod for hanging
Design Notes
Transparency inlay is a great medium for expressing yourself. The pattern seems to float in the background and changes with the lighting, from a colored foreground image, to a backlit silhouette.
After your first transparency, youll probably want to create your own designs. One thing to keep in mind is if you draw a line horizontally across your design, every discontinuous section of the pattern needs its own yarn supply. For example, the eye sockets of this skull design require three bobbins. So its better to start with simple, solid, designs, rather than a tribal-inspired lacey spiral.
You will find that when you are weaving the pattern yarn, sometimes its ambiguous about exactly where you should end the weft shot. My advice? Color inside the lines. I always err on the side of keeping the weft inside the lines on the pattern. Whatever methodology you choose, be consistent.
Also, you will need to have a separate butterfly (or bobbin) of pattern yarn for each non-contiguous part of the pattern. For example, when you first start weaving the bottom of the pattern, you will need two butterflies of pattern weft, one for each bone. Also, remember that you weave all the way across the warp each time, so you have to start both bones at the same time.
For more on transparancy weaving, try Sheer Delight: Handwoven Transparencies by Doramay Keasbey or the online pattern "Diaphanous Leaves" by Sally Ogren.
[Editor's note: you will need to know your way around a loom for this project, but if you're just starting weaving be on the lookout for more from Syne in 2009. Also, we highly recommend any weaving enthusiasts to check out Syne's WeaveZine and WeaveCast.]
Warping:
Wind a warp two yards long, of 96 warp ends. This will give you plenty of room for loom waste and will let you make two or three flags in case the first one is destroyed in an uprising or mutiny.
Note: If you are using a rigid-heddle loom, you may opt to use the direct-warping method, in which case youd want to pull 48 loops through to the peg.
Warp the loom. If you are weaving on a four-shaft loom, warp it in a straight-draw threading (1,2,3,4, 1,2,3,4, etc.) If you are weaving with a rigid-heddle loom, warp it as per normal (hole, slot, hole, slot.)
Weaving the Header:
Pin the transparency underneath.
Syne Mitchell (photo)
click image to enlarge
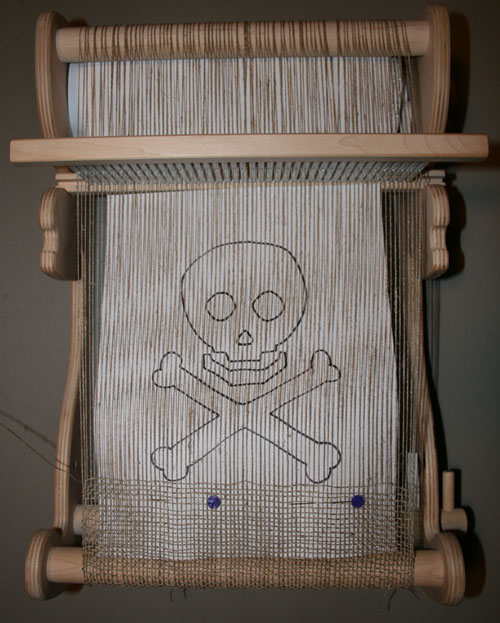
Weave an inch or so of plain weave using the linen yarn. This is the yarn you will use as the background weft. Practice gently pressing this weft into place. You want the background cloth open and lacy so the pattern yarn can float between the linen picks. Ideally, you should be weaving to square; there should be twelve weft shots to the inch.
This section of your cloth will look very cheesecloth-y. Its supposed to. The linen yarn is sticky and stiff enough that it will hold it shape. It is this openess of the background cloth that makes the transparency work. When light shines in from behind, the pattern becomes a silhouette that appears to hover in the air.
Now that you have a bit of cloth woven, pin the transparency pattern to this cloth, under the loom.
Weaving the Pattern:
Syne Mitchell (photo)
click image to enlarge
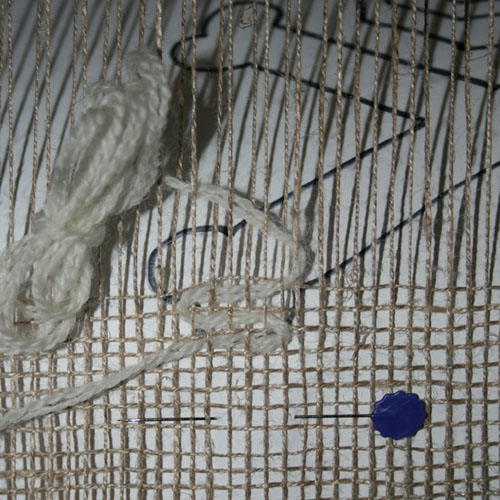
Now comes the fun part. You will alternate weaving the background (linen) weft with the pattern weft (wool.) The fluffy wool yarn should fill in the gaps between the linen background cloth and create solid areas.
Plain-Weave, Rigid-Heddle Version ONLY
If you are weaving plain weave, you will:
- Open a new shed.
- Place the pattern weft in the areas outlined by the skull pattern.
- Gently squeeze the pattern weft into place.
- Open the same shed as in Step 1.
- Throw the background weft.
- Beat it gently into place. [Editor's note: heh!]
- Open the next shed and repeat Steps 2-6 until the entire pattern is woven.

Plain-weave, Rigid-heddle
click image to enlarge
You might find yourself wanting to skip Steps 4 and 5 and simply beat both the pattern and background wefts into place at the same time. Dont. This will cause the pattern yarn to slip under the background weft in an unbecoming way. Take the extra time to place the pattern weft seperately.
The full plain-weave weaving sequence is shown in the weave draft on the right, where the large white yarn represents the wool pattern yarn, and the tan and brown the background warp and weft. The drawdown looks a little weird, because it does not take into effect that the pattern yarn will smoosh in between the linen yarns.
Twill, Four-Shaft
click image to enlarge
If you are weaving the twill, four-shaft, version the procedure is similar, but you weave the pattern shots in a twill progression.
- Open the first twill shed.
- Place the pattern yarn in the areas outlined by the skull pattern.
- Gently squeeze the pattern yarn into place.
- Open a tabby shed.
- Place the background yarn, and beat gently into place.
- Repeat steps 1-4, rotating through the twill progression and alternating tabby as shown in the weave draft on the right.
Weaving the Casing:
When you are done weaving the pattern, weave another inch or so of background cloth, and then weave three inches of fabric with the linen weft in which you beat firmly. This will be hemmed to make the casing for the knitting-needle hanger. It needs to be more firmly woven to support the hem stitches and the weight of the flag.
Finishing:
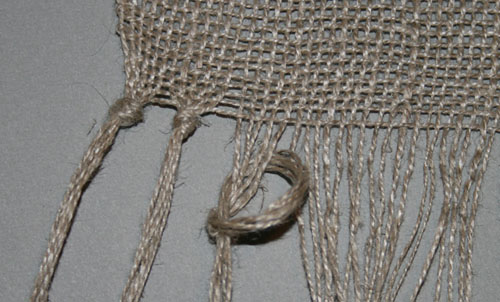
Tying knots.
click image to enlarge
When you are done weaving, cut the fabric off the loom and tie overhand knots at the bottom to secure the weft. Trim the bottom fringe to three inches.
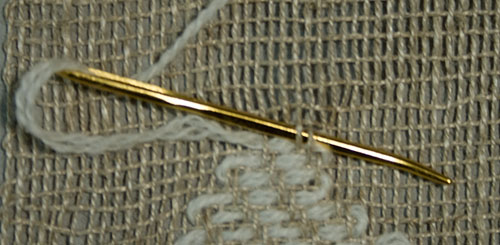
Darning.
click image to enlarge
Darn in the ends of the pattern-weft yarn by taking a tapestry needle and carefully re-tracing the pattern yarn. After two or three rows, trim close. The stickiness of wool will hold it in place.
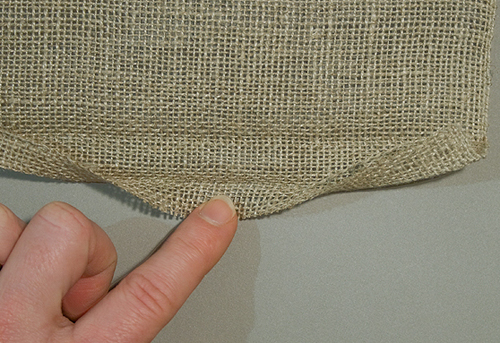
Fold-over hem.
click image to enlarge
Fold over the top of the firmly-woven cloth and hem it by hand using the linen yarn.
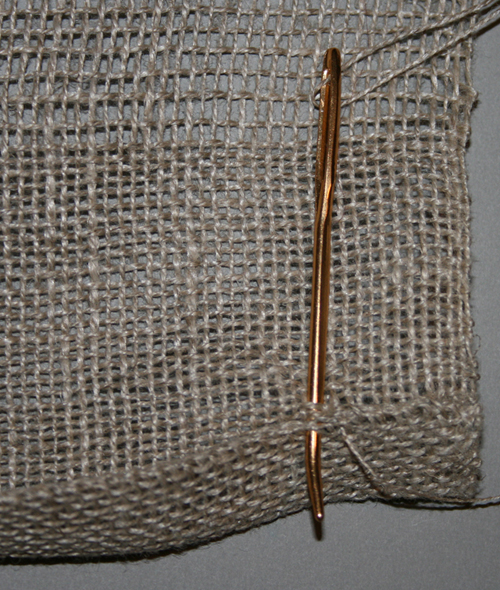
Sewing with linen yarn.
click image to enlarge
Then sew a casing for the knitting needle, again sewing it up with the linen yarn and a tapestry needle.
For the hanger, twist and ply the linen yarn into a rough rope. You may have to fold and ply the linen several times to get the weight of rope you want. The hanger pictured is a cabled yarn of 32 ends total, that started as a single length of yarn about nine feet long that was folded and plied five times. By creating your yarn by folding, you end up with nice loops at either end, and only one skinny two-thread knot to tie that is easily buried inside the rope.
Slip the knitting needle (or dowel rod) through the flags casing, slide on the rope hanger, and youre done!
Now fly your colors and declare your turf!
About
 contact Syne:
• legal info
contact Syne:
• legal info
![]()
home • antifesto • this issue • archive • submit • errata • masthead • contact us • legal