

 |
 |
 |
 |
 |
 |
 |
 |
Zabet Stewart (photo)
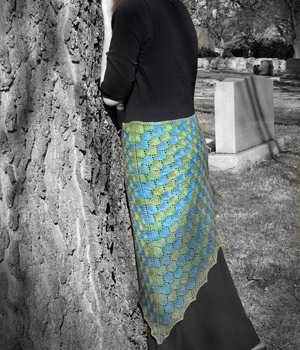
Folktale and myth are full of humans that are something more than they appear. A beautiful maid could be a witch, a fey queen, or an animal under a curse. With this shawl, be something a little more than human, be it mermaid, serpent woman, or dragon queen. Blur the lines of humanity and be a bit of something else.
Hardly had Melusina discovered the indiscreet intruder, than, transforming herself into a dragon, she departed with a loud yell of lamentation, and was never again visible to mortal eyes.
—Sir Walter Scott, Minstrelsy of the Scottish Border
Suggested Listening
"Myth" Poem by Delerium
Difficulty
AntiCraft Superstar
Click here for definitions of difficulty levels.
Finished Measurements
65.5"/166 cm W x 34"/86cm H after blocking.
Download
Melusine Chart (pdf format)
Materials
Knitting
- Knit Picks Bare Merino Wool, Silk Sock Yarn [70% wool, 30% silk; 440yd/402m per 3.5oz/100g skein] undyed, 3 hanks (2 skeins exactly for the shawl and the third used for swatches and dyeing samples)
- US 5/3.75mm 60/152cm circular needles
- Tapestry needle
Dyeing
- ½ oz. Jacquard Acid Dyes, 1 each of Yellow Sun, Kelly Green, Emerald Green, Turquoise, Periwinkle, and Black
- Rubber or latex gloves
- Particulate mask
- Goggles
- Plastic drop cloth (9x12)
- Paper towels
- Liquid measuring cup
- Measuring spoons
- Funnel
- 6 2-liter bottles with caps
- Permanent marker
- Water source
- 6 large disposable cups
- White vinegar
- Textile detergent, such as Synthropol, or Dharma Professional Textile Detergent
- 1/2.5cm sponge brushes
- 2 plastic bags with ties
- Car (if it is not your car, make sure to get permission to use)
Gauge
23 stitches and 34 rows per 4"/10cm in stockinette. Remember that gauge is pretty forgiving when working lace.
Design Notes
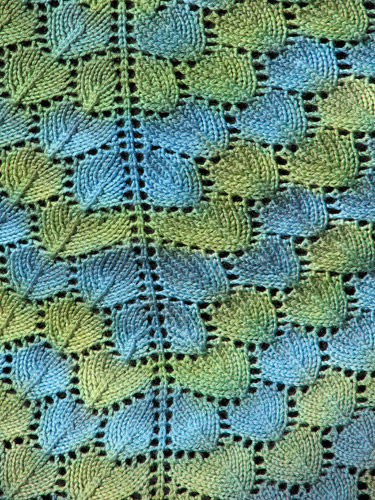
The chart is set up to give you multiples charts together so you can see how the stitches connect. Charts 1, 2, and 3 are in red boxes. Chart 2 is broken into sections A, B, C, and D. Charts 2 and 3 have a starter pattern, a repeat pattern in a blue box, and then a finishing pattern. Remember to only repeat the parts in the blue boxes, but don't forget to start with what's on the right and finish with what's on the left.
I strongly suggest knitting a swatch or two in pattern and dying it to get a feel for how to dye the finished shawl. Since these are smaller, you can use plastic wrap instead of the tarp and they can be heat set by steaming or microwaving.
The dyeing method described herein is for during hot summer months. This gives you time to knit your shawl in the spring, play with the dyes, and finally paint the shawl come hot weather.
Remember that dyes are not safe for eating and use pots or containers that will never be used for food.
Special Stitches:
Double Decrease (DD):slip 2 stitches to the right needle as if to knit 2 together, knit the next stitch and pass the two slipped stitches over.
Lace Bind Off (aka Decrease Bind Off): K2, *transfer the two stitches back to the left hand needle and k2tog tbl, k1.* Repeat from * to * until you are at the end.
Knit the Shawl:

Zabet Stewart (photo)
click image to enlarge
Provisionally CO 3 stitches.
Knit 7 rows of garter stitch.
Keep last row on the needles and pick up 3 stitches from one side of the piece, undo the provisional cast on and pick up the 3 stitches from the CO edge, so that you have picked up 3 of the 4 sides of your little garter stitch square.
Next Row: (WS) K3, p to 3 from end, k3 (and all subsequent even rows)
For all following right-side rows: K3, yo, complete the stitches as shown in Melusine Chart, yo, k1, yo, repeat the stitches of the chart, yo, k3.
For example:
Row 1: K3, yo, (k1, yo)x3 , k3
Row 2: K3, p to 3 from end, k3
Row 3: K3, yo, k3, yo, k1, yo, k3, yo, k3
Row 4: K3, p to 3 from end, k3
Row 5: K3, yo, k5, yo, k1, yo, k5, yo, k3
Row 6: K3, p to 3 from end, k3
Zabet Stewart (photo)
click image to enlarge
Complete Chart 1 one time.
Complete Chart 2 a total of 4 times:
1st time: work as shown in chart.
2nd time: work pattern repeats (in blue boxes) A & B 4 times and C & D 6 times.
3rd time: work pattern repeats A & B 7 times and C & D 9 times.
4th time: work pattern repeats A & B 10 times and C & D 12 times.
Complete Chart 3 once, working pattern repeat (in blue box) 12 times.
Bind off using Lace Bind Off method.
Hydrate the Dye Stock:
Wear gloves, protective goggles, and dust mask. Best place to do this is outside.
Write each dye name, type and date on the 2-liter bottle with a permanent marker.
Carefully put the dye powder in the assigned bottle. Funnels are useful for this step, but make sure you clean the funnel thoroughly between dyes.
Pour 1485 ml of very warm water into the bottle. Cap tightly and shake well to dissolve the dye powder. Dye stock made with water like this will keep, capped, in a cool dry place for several weeks.
Preparation for Painting:

Janis Neville (photo)
click image to enlarge
Soak finished shawl in warm water with a glug of textile detergent for at least one hour.
While the shawl is soaking, prepare your dyeing area. Put down the drop cloth with one half for dyeing and the other half to the side so it can be folded over after the dyeing is finished. Also, mix up your dyes (below).
When the shawl is soaked, gently pull it out of the water and press out the excess water, but leave it damp. Spread it out on the working half of the tarp.
Mix Up the Dyes for Painting
Janis Neville (photo)
click image to enlarge
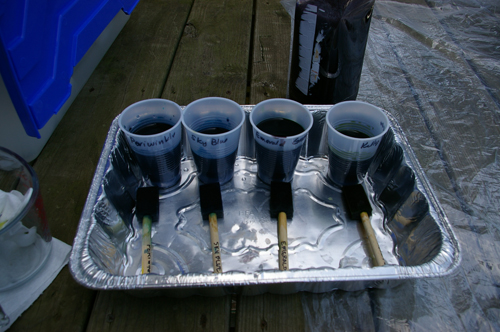
Label your cups and brushes ahead of time, so you dont mix (or mix up) the colors accidentally.
Mix the dyes in the assigned plastic cups. I needed at least two batches of the light green and blue before I was through, so you may want to mix up two batches ahead of time. The colors are intended to blend some, but if you dont want them to spread, you may want to get some sodium alginate to make the dyes thicker.
Light Green
2 Tbsp vinegar
4 tbsp water
1 tbsp Kelly green
1 tbsp yellow sun
1 tsp black
Dark Green
3 tbsp vinegar
3 tbsp water
1 tbsp Kelly green
1 tbsp emerald green
1 tbsp black
Light Blue
2 tbsp vinegar
4 tbsp water
1 tbsp turquoise
1 tbsp periwinkle
Dark Blue
3 tbsp vinegar
3 tbsp water
1 tbsp turquoise
1 tbsp periwinkle
1 tbsp black
Light Black
3 tbsp vinegar
6 tbsp water
1.5 tbsp black
Medium Black
3 tbsp vinegar
3 tbsp water
1.5 tbsp black
Hand Painting Dyes:

Pattern A Start
Janis Neville (photo)
click image to enlarge
Wear your gloves, unless you want to be known as "Blue Hands."
Pattern A
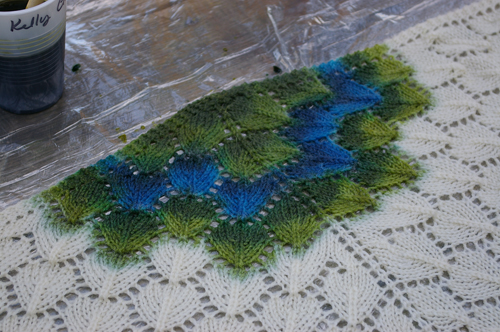
With the dark green dye and brush, dab the dye on the upper part of each scale in the row, so it looks like it is shadowed. It should only take one or two touches of the brush per scale. Make sure to dye the garter stitch border as well.
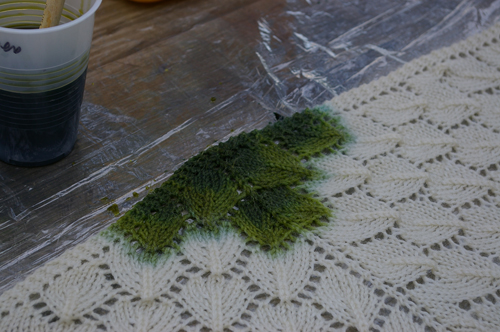
Pattern A Finish
Janis Neville (photo)
click image to enlarge
With the light green dye and brush, dye the entire row of scales, making sure to dye over the dark green. Make sure to dye the garter stitch border.

Pattern B Start
Janis Neville (photo)
click image to enlarge
Pattern B
With the dark blue dye and brush, dab the dye on the upper part of each scale in the row, as well as the garter stitch border.

Pattern B Finish
Janis Neville (photo)
click image to enlarge
With the light blue dye and brush, dye the entire row of scales, dyeing over the dark blue sections as well. Dye the garter stitch border for the row.
A, B, A
Janis Neville (photo)
click image to enlarge
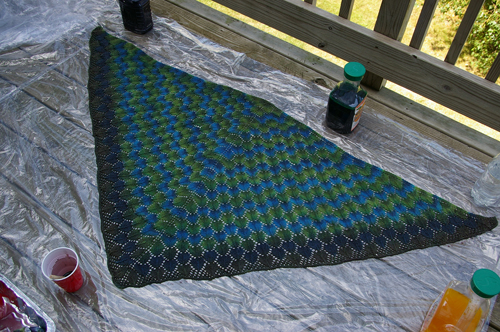
Continue dyeing rows of scales in alternating painting patterns (A, B, A, B, etc.) until the entire shawl is dyed.
Medium Black
Janis Neville (photo)
click image to enlarge
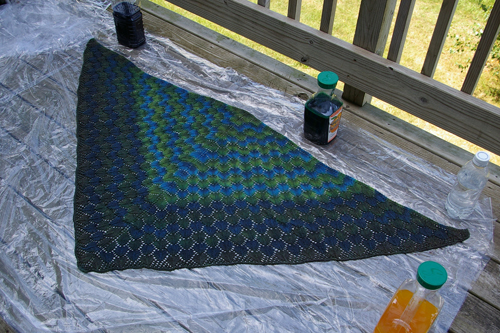
Now, take the medium black dye and brush and dye over last two rows of scales and edging.
Light Black
Janis Neville (photo)
click image to enlarge
Then take the light black and brush dye over the last two rows and edging and continue upward for four more rows.
Set the Dye:
Janis Neville (photo)
click image to enlarge
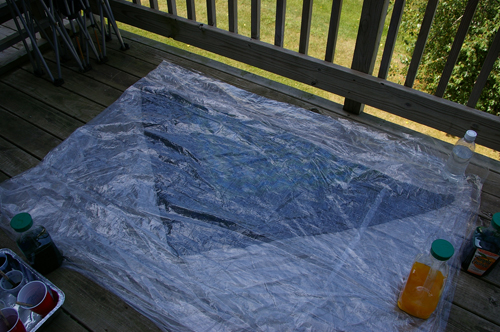
At this point, the painting is finished. Clear away all the cups and brushes and fold the tarp over the top of the shawl.
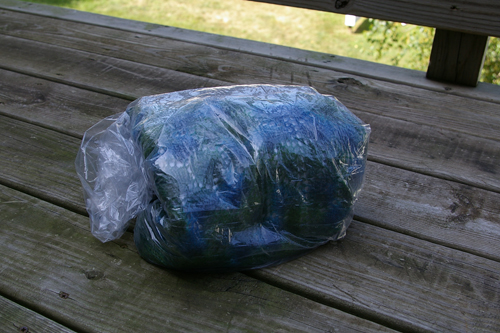
Folding and rolling.
Janis Neville (photo)
click image to enlarge
Carefully fold the tarp and shawl up lengthwise and then roll up.
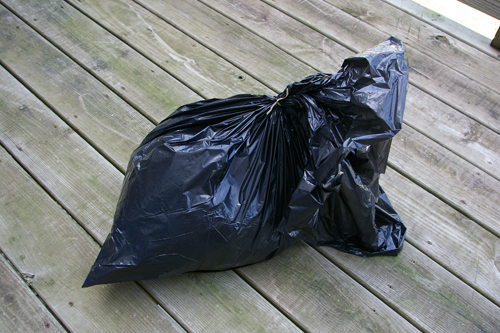
Ready to bake.
Janis Neville (photo)
click image to enlarge
Then put inside one black trash bag and tie closed. Take this bag and place it entirely into another black trash bag and tie closed. Make sure there are no holes or ways for any fluids to leak to keep any dyes from staining the car. Place into a closed car at the height of summer and let bake for 2-3 days, depending on the outside temperatures.
Once it is finished baking, take out of the car and let it cool down completely (such as overnight). Rinse in baths of cool water, making sure not to agitate (with a glug of textile detergent for the first bath) until the water remains clear. Roll in a towel to get the excess water out of shawl.
Finishing:
Pin out gently to keep the scale structure visible, and allow to completely dry. Unpin, admire your ingenuity, and wear.
About
 contact Janis:
• legal info
contact Janis:
• legal info
![]()
home • antifesto • this issue • archive • submit • errata • masthead • contact us • legal