
 |
Beltane 2009 |
 |
 |
 |
piece of pisces > neko manko chan > classique > be prepared >
what are you looking at? > little mary merkin > supurbia > mo' hair >
mer(maid)kin > fly fishing > dentata > high drama

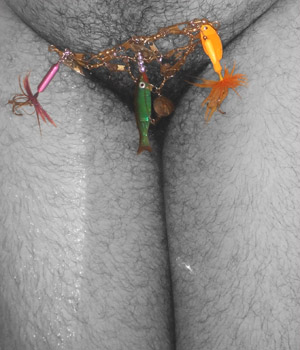
Mama Cat (photo)
Anthony Ascione (model)
Nets and lures to captivate and catch the desired prey.
Suggested Reading
Sex, Death, and Fly-Fishing
by John Gierach
Difficulty
Rrrrgh . . . . Brains . . . .
Click here for definitions of difficulty levels.
Finished Measurements
5”/12.7cm W x 5”/12.7cm H
Download
Fly Fishing Diagram (pdf format)
Materials
- 4 large snap swivels (1.75”/4.5cm long)
- 5 medium snap swivels (1.5”/3.8cm long)
- 3 extra-small snap swivels (1"/2.5cm long)
- 6 small snap swivels (1.25”/3.2cm long)
- 1 jig spinner
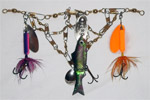
- 3 fishing lures (photo shows 2 rooster tails and 1 minnow)
- Jump rings, one per lure
- Wire snips
- Needle nose pliers (2 may be helpful)
- Fishing line
Design Notes
If you are actually planning on wearing this piece, you might want to snip off the fishooks from the lures for safety reasons, unless you have a deep desire to mutilate yourself or others. You may want to snip them off just for ease of handling even if you aren't planning on wearing it. It's up to you. We're not responsible for any accidental piercings or back-alley vasectomies.
Keep the diagram handy as you're going through the steps below.
Step 1:
Connect 3 large snap swivels in a row (snap to next swivel). This is the top row of the merkin, which on the diagram contains whole snap swivels B, I, and A.
Clip the eye of the 4th large snap swivel with wirecutters, removing the snap and leaving just the swivel. Attach to Snap B.
Step 2:
Connect 5 medium snap swivels in a row (snap to next swivel). This row will hang in a V-shape and become the left and right sides of the merkin.
On the diagram, it is made of whole snap swivels C, E, F, J, and D.
Attach Swivel C to Snap B. Snap B should now have two things attached to it.
Attach Snap D to Eye A.
Step 3:
Connect 3 extra-small snap swivels in a row (snap to next swivel). This row will bisect the merkin vertically, and on the diagram includes whole snap swivels K, G, and H.
Attach Snap C to Swivel K.
Attach Snap H to Swivel D (where Snap J is also attached).
Step 4:
Name the 6 small snap swivels L, M, N, O, P, and Q, then attach them in this order:
1. Snap L to Eye B; then Swivel L to Snap C.
2. Swivel M to Snap I; then Snap M to Swivel G.
3. Snap N to Eye I; then Swivel N to Snap G.
4. Swivel O to Snap A; then Snap O to Swivel D.
5. Snap P to Swivel G; then Swivel P to Snap E.
6. Snap Q to Swivel H; then Swivel Q to Snap F.
(Confused yet? Good! Moving on!)
Step 5:
Take jig spinner off wire and hang from Eye F.
Decoration:
Use jump rings to hang the lures from the top row of large snap swivels. Place them in the Snap, Eye, or Swivel, as you see fit.
Wearing:
Use fishing line to hang around hips from the top row's end swivels.
About
 contact Janis:
• legal info
![]()
home • antifesto • archive • errata • masthead • angstylvania • legal
