

 |
 |
 |
 |
 |
 |
 |
 |
vegan coconut pie pie > beanis > petticoat for the ages
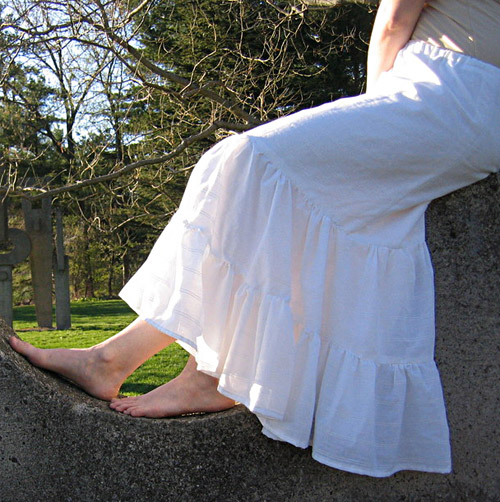
Christopher Lansdown (photo)
Beth Skwareck (model)
click image to enlarge
Although you can make this petticoat as a skirt to wear to work or school, its main utility is in its usefulness for the time-traveler. Say your future self invents a time machine, and comes back to offer you a ride in it, say next week. Maybe the two of you want to visit the Renaissance, or maybe you're thinking Victorian. And maybe you want to stop and see the American Colonies on the way back, or drop in on a Sock Hop. I know what you're thinking - what do I wear? And more importantly, what do I wear under it?
Just as a space traveler's best friend is his towel, a time traveler's best friend is her petticoat. Fashions come and go, but for a good 400 years or so they all required some floofiness under your skirt. And before some wise woman discovered pants, a warm fluffy petticoat was the best way to keep your legs from getting cold in the winter.
Here I'll give you a recipe for a basic petticoat, not too fluffy, suitable for everyday wear as a modern 2000s woman. When your future self arrives, just slip an appropriate dress over it and you're ready to go!
Suggested Watching
Doctor Who (New or Classic) on the BBC
Difficulty
Boy Scout Burnout
Click here for definitions of difficulty levels.
Finished Measurements
Tailored to fit, but ~39" long if not shortened before making a casing for the elastic in the last step.
Download
Petticoat pattern with full-sized illustrations (pdf format)
Materials
- Fabric for ruffled skirt: 2.5-3.5 yards of 45" wide fabric (see chart below).
- Fabric for optional lining: 2.5 yards of 45" wide fabric
- Thread to match
- ½" elastic for waistband, enough to comfortably fit your waist
- Sewing machine (or hand needle and a lot of patience)
- Iron and ironing board (optional, but recommended)
- A box of straight pins
- Two large safety pins (for threading elastic)
- Measuring tape
- A good pair of scissors
- Pencil or chalk to mark fabric
| Your actual hip measurement | Width of skirt at waistline |
Width of skirt at knee |
Approximate yards of 45" fabric |
|---|---|---|---|
| 34" | 38" | 46" | 2.5 yds |
| 38" | 42" | 50" | 2.75 yds |
| 42" | 46" | 54" | 3 yds |
| 48" | 52" | 60" | 3.5 yds |
| 52" | 56" | 64" | 3.5 yds |
| 56" | 60" | 68" | 3.75 yds |
| X | X+4" | X+12" | (X+12)/18 yds |
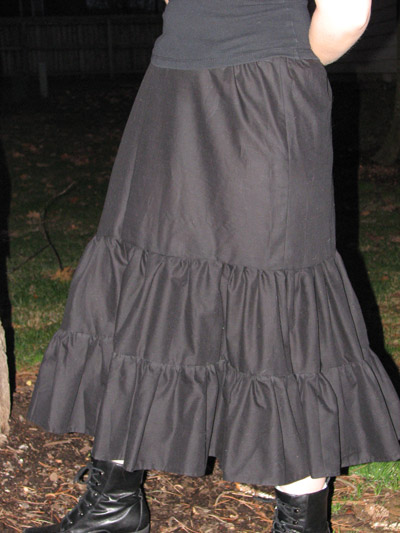
Zabet Stewart (photo)
Brittany Griffin (model)
click image to enlarge
Pattern Notes
For a white petticoat, bleached muslin is perfect. For a formal skirt, try a satiny fabric for the lining and a sheer fabric for the ruffles. Don't be afraid to get creative in your fabric choices - my petticoat, shown in the photo, was actually made from old pillowcases! If you're new to sewing and confused about buying fabric, just explain to the nice people at the fabric store what you're trying to do. They'll help you out.
The skirt as given will reach a few inches above your ankles. If you want to have a long floor-length skirt (or if you're very tall), buy 60" fabric instead of 45", and make each tier a few inches longer than the standard size.
After reading through this recipe, skilled seamstresses/seamsters will find it easy to adapt the petticoat to different lengths and fullnesses. For example, make each tier shorter, and the skirt will have a shorter overall length. If you make more tiers, the skirt will be fuller, since each tier must use more fabric than the one before it.
As a variation, consider sewing some lace trim to the hem.
Note from an Editrix: Zabet and Raellyn made the black muslin version to test the directions. Zabet is a complete newbie sewer; Raellyn is a pro and was there to guide Zabet (and sew the seams because Zabet is still sort of afraid of the sewing machine noise.) Zabet says, "Remember that the 'waistline measurement' is NOT your actual waist measurement. It is based off your hip measurement and then you do a bunch of math - you have to be able to pull this skirt on over your hips, so if you base anything on your actual waist meaurement, you'll just be screwed. Figure 3 includes a worksheet, so you may want to print it out."
Directions
Measurements:

Figure 1
Petticoat Schematic
click image to enlarge
Begin by taking your hip measurement and buying the appropriate amount of fabric. Except for the waistline measurement (your hips plus 4 inches), all numbers are approximate, so if you're off by an inch or two, no big deal.
Here is what the skirt is made of: the first (top) tier goes from your waist to a little above your knee. Its circumference at the bottom is the "width of skirt at knee" measurement in the chart. (We'll cut this tier later so the waistline is a bit narrower than the knee measurement; it fits better that way.) The second tier is a ruffle sewn onto the first tier, and the third tier is a ruffle sewn onto the second (see Figure 1).
The secret to fluffing out the petticoat is to use more fabric in each successive ruffle. We'll use twice as much fabric in the second tier as in the first tier, and twice as much fabric in the third tier as in the second. So if your knee width is 50 inches, your second tier will be 100 inches around, and your third tier will be 200 inches.
Cutting Out the Fabric:
Figure 2
Cutting Layout
click image to enlarge
Lay out your skirt fabric, completely unfolded, on a clean floor or a large table. Be sure to measure and cut carefully; the straighter your pieces, the easier they will be to sew together.
Cut three strips of fabric 9" wide and as long as you can (if you bought 3 yards of fabric, these strips will be about 3 yards long). One of these strips will be the second tier; the other two strips will be sewn together to form the third tier. The remaining fabric will be about 18" wide. Cut it in half crosswise, making a piece that is 18" by (in our example) 1.5 yards wide. This piece will be the top tier (see Figure 2).
Those Damn Trapezoids:
Figure 3
Cutting Those Damn Trapezoids
click image to enlarge
Fold the top tier in half, and cut it into a trapezoid shape. The bottom of the trapezoid should be as wide as it can be; the top of the trapezoid should be the waistline measurement (see above) plus one inch for seam allowances (see Figure 3). All seams should be 1/2" (or 5/8" if you prefer).*
The Hem:
This is backwards from how many modern skirts are made, but we're going to start with the hem, and work upwards. It's a lot easier that way.
Figure 4
Double-Folded Hem
click image to enlarge
Holding the right sides together, pin and sew two of the long 9" strips together at their short edge; this will make one very long strip, 9 inches wide and perhaps 6 yards long. Using the iron if you have it, press this seam open. (If you don't have an iron, just pin it open). Starting at one end of the long strip, fold the bottom edge up by about 1/4", press it, then fold and press again, by about 1/2". This hides the raw edge of the fabric. Pin these folds in place, and continue along the strip until the whole long edge has been double-folded this way. When you've finally finished, stitch all the way along this fold. This is the longest seam in the whole skirt; it's all downhill from here.
Gathering the Ruffles:
Figure 5
Gathering the Ruffles
click image to enlarge
With a basting stitch (the longest, sloppiest stitch your sewing machine can do), stitch along the top edge of the strip that would be the edge that you did not just hem. Don't secure the ends of this thread by sewing backward and forward we actually want this thread to be loose. If you pull on this thread, see how the fabric scrunches up? This is how we make ruffles.
Match up one corner of your second-tier fabric with a corner of the third-tier fabric you've been working with. Yes, the third-tier strip is twice as long as the second-tier! Holding the right sides together, pin the corners of the two strips together. Then find the center point of each strip (there will be a seam in the center of the third-tier strip) and pin the center points together. This divides the strips into two halves; find the center point of each half, and pin those together, too. You've now divided your strips into four equal sections, which will help to make sure you're gathering the ruffles evenly.
To gather, just pull the basting thread tight to create ruffles, and arrange those ruffles evenly across the section you're working with. Use pins every inch or two to fix the ruffles in place.
To join the tiers permanently, sew the pieces together. Have the ruffled piece of fabric on top as you feed the two layers into your sewing machine. Sew slowly and carefully to make sure the bottom fabric doesn't scrunch up. Congratulations, you've made your first ruffle! (See Figure 6)
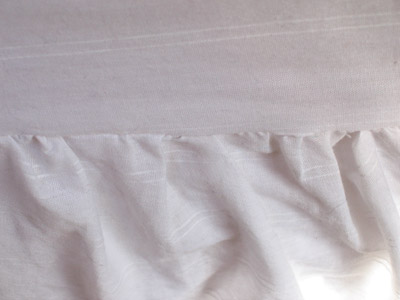
Figure 6
Closeup of an Attached Ruffle
click image to enlarge
Now it's time to sew the second tier to the first. Get your trapezoid pieces that you cut for the first tier, and sew one of the diagonal seams (holding the right sides together, as usual). Press or pin this seam open. Run another basting stitch across the top of the second tier, and gather it to the first tier as above.
Now that all three tiers are sewn together, with ruffles, it's time to sew the skirt closed. Start at the hem and sew toward the waist, this way any unevenness can be corrected when adding the elastic in the last step.
To try on the skirt, tie a piece of elastic around your waist, and slip the skirt's waistband area under the elastic, folding the top over the elastic by about 1.5". Make sure the skirt is easy to pull on and easy to walk around in. If it's too long, trim a little fabric off the top.
The (Optional) Lining:
Without a lining, your skirt may be a bit see-through. It will also have a lot of raw edges on the inside of the ruffles, so adding a lining will make the skirt last longer and feel more comfortable.
Unfold your lining fabric, and fold it in the other direction, right sides together, so you have a double layer of fabric, 45" tall and 1.25 yards wide. Lay your inside-out ruffled skirt on top of the lining fabric, and trace it. It's important that the lining in the top tier area is the same size as the skirt's top tier or just a smidge smaller. Underneath the second and third tiers, though, the lining's width isn't important; I let my tracing flare out to accommodate the widening of the ruffled layers.
Cut out the fabric on the lines you traced. Pin and sew both side seams, right sides together as usual. Try the lining on. There may be "corners" at the edges of your seams; if so, trim them off. Try on the lining and skirt together; the lining should be the same length as the skirt, or a tad bit shorter.
Hem the lining with a double fold, as you did with the hem of the skirt.
Putting It All Together:

Christopher Lansdown (photo)
Beth Skwareck (model)
click image to enlarge
Slip the lining inside the skirt, but this time the wrong sides should be together the seamy side of the skirt should be against the seamy side of the lining. Pin the two layers to each other at the waistband, and stitch them together. If you're paranoid like me, try the skirt on one last time to make sure everything is OK.
The last step is to make the casing for the waistband elastic. This step also, conveniently, hides the raw fabric edges. First, fold the edges in about 1/4", and press or stitch this fold in place. Next, fold down again, leaving enough space for the elastic. (If the elastic is 1/2", try a 3/4" fold). Stitch along this fold, but don't go all the way around the waist leave about an inch folded but un-sewn. This is where you will slip the elastic in.
Cut a piece of elastic that fits your waist snugly, plus one inch. Attach a safety pin to one end; this will let you thread the elastic through the casing. (You may want to pin the other end to something, so it doesn't get pulled into the casing and lost). Work the elastic through the casing. Once the elastic is through, overlap the ends of the elastic by one inch and sew them together. That's it! You're now the proud owner of a beautiful petticoat.
About
![]()
home • antifesto • this issue • archive • submit • errata • masthead • contact us • legal