

 |
 |
 |
 |
 |
 |
 |
 |
stabbity stab stab > flaming cheese > catch his eye >
surprise #1: little mr. wickett > surprise #2: mr. edless
Carin Huber (photo)
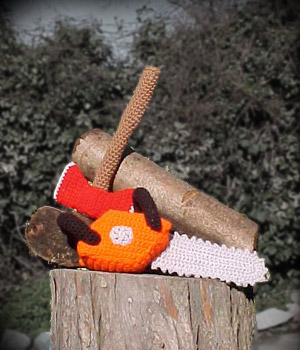
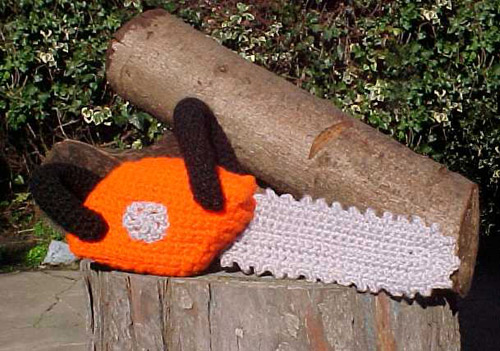
He'd been splitting logs when the backpacker showed up. Out here in the woods, a hundred miles from nowhere, and people still wouldn't leave him alone. The kid couldn't have been more than 20, out for a week-long hike, "finding himself," he said.
Everything would have been alright, if he'd just said "hello" and kept moving. But the surprise of finding the small cabin, occupied, so far from civilization had loosened the kid's tongue, and his brain. Right about the time he said, "Don't I know you from somewhere?" the woodchopper knew it was too late. A quick swing of the axe had ended the questions.
Why wouldn't people just leave him alone? He'd set up house as far away from everyone as possible, for his safety, and theirs. And still they persisted in bothering him.
He sighed as he reached for the chainsaw. He would have to get rid of the evidence.
At least he could use the meat.
Suggested Reading
Misery by Stephen King
Suggested Viewing
The Texas Chain Saw Massacre (1974, rated R)
Difficulty
Loose Woman
Click here for definitions of difficulty levels.
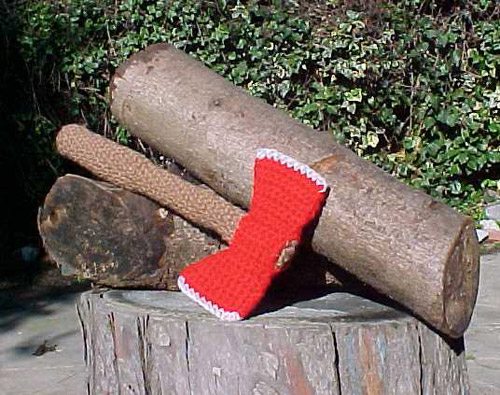
Finished Measurements
Axe is 12" (30.5cm) L. Chainsaw is 15" (38cm) L.
Materials
Axe
- Red Heart Super Saver Worsted [100% Acrylic; approx. 160 yd/146 m per 3 oz/85 g skein]; Cherry Red, 1 skein
- Red Heart Super Saver Worsted [100% Acrylic; approx. 160 yd/146 m per 3 oz/85 g skein]; Light Grey, 1 skein
- Red Heart Super Saver Worsted [100% Acrylic; approx. 160 yd/146 m per 3 oz/85 g skein]; Cafe, 1 skein
- Size H/5mm crochet hook (or size necessary to obtain gauge)
- Scissors
- Tapestry needle
- Wire coat hanger
- Pliers
- Wire cutters
- Measuring tape or ruler
- Large long knitting needle, or similar
- Fiberfill
Chainsaw
- Red Heart Super Saver Worsted [100% Acrylic; approx. 160 yd/146 m per 3 oz/85 g skein]; Vibrant Orange, 1 skein
- Red Heart Super Saver Worsted [100% Acrylic; approx. 160 yd/146 m per 3 oz/85 g skein]; Light Gray, 1 skein
- Red Heart Super Saver Worsted [100% Acrylic; approx. 160 yd/146 m per 3 oz/85 g skein]; Black, 1 skein
- Size H/5mm crochet hook (or size necessary to obtain gauge)
- Scissors
- Tapestry needle
- Sewing pins (Optional - see Design Notes)
- Wire coat hanger
- Pliers
- Wire cutters
- Measuring tape or ruler
- Fiberfill
Gauge
N/A for amigurumi.
Samples are knit to 16 sts and 16 rows per 4"/10cm.
Design Notes
US terminology is used for all instructions. (Click for US to UK conversions.)
Due to the wire framework in these pieces, they may not be suitable toys for children under 3 years old.
One skein of each color of yarn will make many axes and chainsaws.
You may find it helpful, when assembling the chainsaw engine casing, to pin the sides to the rest of the body to ensure that the pieces are sewn together evenly, and that the long band reaches all the way around the sides with a minimum of stretching.
Special Techniques:
Magic ring: http://crochetme.com/Dec_Jan_0405/reads_round.html
Sc in back loop (sc in bl): http://www.nexstitch.com/v_front_back_loop_stitch.html
Picot: http://crochet.about.com/od/learnmorestitches/ss/picothowto.htm
Sides of Head:
Carin Huber (photo)
click image to enlarge
Make 2, in Cherry Red.
Ch 7. Turn.
Row 1: Sc in 2nd ch from hook. Sc across. (6 sts) Ch 1, turn.
Row 2: Sc across. (6 sts) Ch 1, turn.
Row 3: Repeat Row 2.
Row 4: Sc in next 5 sts, 2 sc in last st. (7 sts) Ch 1, turn.
Row 5: Sc across. (7 sts) Ch 1, turn.
Row 6: Sc in next 6 sts, 2 sc in last st. (8 sts) Ch 1, turn.
Row 7: Sc across. (8 sts) Ch 1, turn.
Row 8: Sc in next 7 sts, 2 sc in last st. (9 sts) Ch 1, turn.
Row 9: Sc across. (9 sts) Ch 1, turn.
Row 10: Sc in next 8 sts, 2 sc in last st. (10 sts) Ch 1, turn.
Row 11: Sc across. (10 sts) Bind off.
Attach yarn to end of starting chain, opposite the tail. Crocheting in bottom of starting chain, repeat from Row 1.
Top (End of Haft):
Make 1, in Cafe.
Rnd 1: Make a magic ring. Ch 1. 8 sc into ring. Pull ring tight, join with sl st. Ch 1.
Rnd 2: *2 sc in next 2 st, sl st in next 2 sts, repeat from *. Join with sl st. (12 sts) Bind off.
Axe Head Assembly:
Holding side pieces of head together, attach Light Gray yarn through corners of both pieces. Ch 1. Join pieces at blade edge by single crocheting along edge through both pieces at the same time. (10 sts) Bind off. Repeat on other edge.
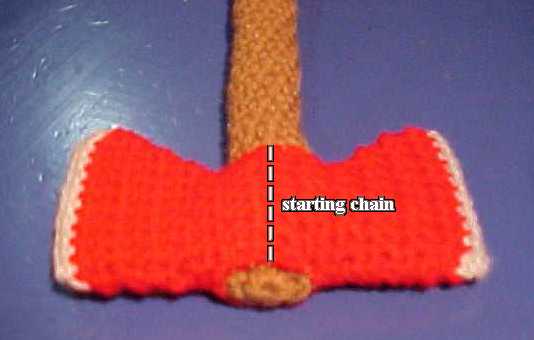
Figure 1
Carin Huber (photo)
click image to enlarge
Place the oval-shaped top piece between the side pieces, so that the long side of the oval is centered on the beginning chain of one side, at the straight side of the head. (Figure 1) Starting at the beginning chain of the side piece, whip stitch the side to the top with Cherry Red yarn. Sew one quarter of the way around the oval, pass the needle through the second side piece, and continue sewing the second side halfway around the oval. Pass the needle back through the first side piece, and sew the rest of the way around the oval.
Whipstitch the rest of the straight side of the head closed. Do not sew the curved bottom side, yet.
Axe Haft:
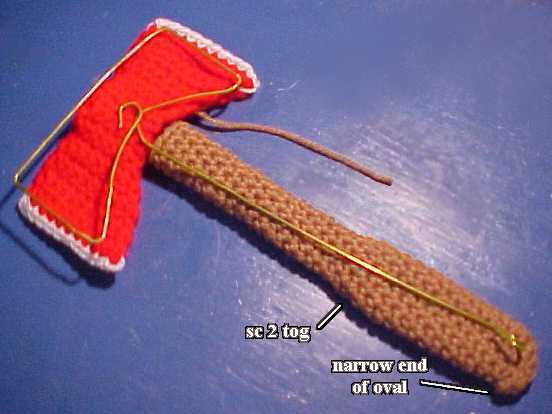
Figure 2
Carin Huber (photo)
click image to enlarge
Make 1, in Cafe.
Rnd 1: Make a magic ring. Ch 1. 8 sc into ring. Pull ring tight, join with sl st. Ch 1.
Rnd 2: *2 sc in next 2 st, sl st in next 2 sts, repeat from * once. Join with sl st. (12 sts) Ch 1.
Rest of haft: Sc in bl in next 12 st. Continue to sc in each st normally (do not join, do not ch 1), until the haft is about 4" long. Sc 2 tog, choosing 2 stitches that are in line with narrow end of starting oval (Figure 2). Sc in next 4 sts, sc 2 tog, continue sc in each st for an additional 6" (10" total). Bind off.
Wire Frame:
Lay the axe head and haft together on a table, as they will be attached to each other.
Open the wire coat hanger up, straightening the bends as best you can. Don't worry about the hook or the coils where the neck was twisted together. Cut the hook off of the hanger with the wire cutters. Using the axe as a guide, bend the wire with the pliers as shown in Figure 2. Cut off any excess wire. Fit the frame as closely to the axe head as possible. The axe head should not have to stretch enough to spread the stitches open in order to cover the frame, but it should not be soft and loose around the edges, either. Use the pliers to curl the ends of the wire into loops, so there won't be ends that could poke out. It's best if the loop at the butt of the haft lies flat with the rest of the frame. Having it turned another direction will cause the axe to twist in your hand when swung.
Axe Assembly and Finishing:
Put a small amount of fiberfill into the butt end of the axe haft, using the head of the knitting needle to lightly push it into place. Put the wire frame into the haft, and continue to lightly stuff the haft, making sure to place fiberfill all around the wire, and not to pack the fiberfill in too firmly. (If you stuff the haft too firmly, the fiberfill will stretch the stitches and show through the outside of the piece. If this happens, remove the fiberfill, then squeeze and work the crochet with your hands until it compacts again. Then re-stuff.)
Once the axe haft is stuffed, slip the rest of the frame into the axe head. With Cherry Red yarn, whip stitch the haft to the head, making sure that the oval at the butt of the haft lies in line with the axe head (as the top piece in the head lies). Place a small amount of fiberfill inside the middle of the axe head, then whipstitch the curved bottom edges closed over the frame.
Chainsaw Engine Case Sides:
Carin Huber (photo)
click image to enlarge
Make 2, in Vibrant Orange.
Ch 16. Turn.
Row 1: Sc in 2nd ch from hook, sc across. (15 sts) Turn.
Row 2: Sl st in 1st st, ch 1, sc in 2nd st, sc across. (14 sts, not including sl st) Ch 2, turn.
Row 3: Sc in 2nd ch from hook, sc in next 14 sts. (15 sts - do not crochet in last st)
Rows 4-13: Repeat Rows 2 and 3. Bind off after Row 13.
Chainsaw Engine Case Exhaust Vent:
Make 1, in Light Gray.
Make a magic ring. Ch 5 (counts as first dc, plus ch 2), * dc into ring, ch 2. Repeat from * 4 times. (18 sts) Pull ring tight. Join with sl st in 3rd ch from beginning. Bind off. Weave ends in.
Position vent in center of one engine case side. Whip stitch in place, using Light Gray yarn.
Rest of Chainsaw Engine Case:
Make 1, in Vibrant Orange.
Ch 11. Turn.
Row 1: Sc in 2nd ch from hook, sc across. (10 sts) Ch 1, turn.
Row 2: Sc across. (10 sts) Ch 1, turn.
Rows 3 - 59: repeat Row 2.
Row 60: Sc across. (10 sts) Bind off.
Chainsaw Engine Case Assembly:
Whip stitch the band around the outside of the side with the vent, starting at one broad corner. This corner will be the bottom front of the case, under the blade. Whip stitch the other edge of the band to the other side piece in the same way. Leave the place where the ends of the band meet open.
Chainsaw Blade:
Make 1, in Light Gray.
Leaving a long tail (at least 6"), ch 21, turn.
Row 1: Sc in 2nd ch from hook, sc in next 19 sts. Form magic ring with tail, 5 sc into ring. Pull ring tight. Continue to sc into bottom of starting ch, crocheting over tail, in next 19 sts. 2 sc in last st. (46 sts) Ch 1, turn.
Row 2: Sc in next 22 sts, 2 sc in next 4 sts, sc in next 20 sts. (50 sts - do not crochet in last st) Turn.
Row 3: Sl st in 1st st, ch 1, sc in next 20 sts, * 2 sc in next st, sc in next st, repeat from * twice, 2 sc in next st, sc in next 21 sts, 2sc in last st. (54 sts, not including sl st) Set aside.
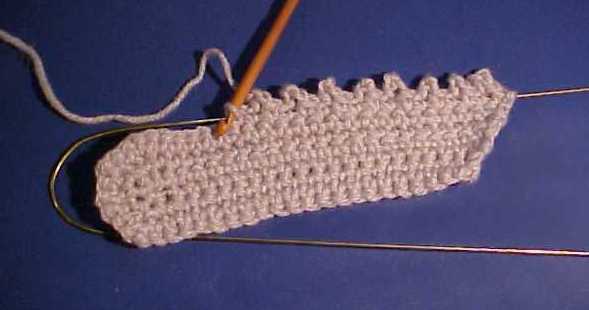
Figure 3
Carin Huber (photo)
click image to enlarge
Open the wire coat hanger up, straightening the bends as best you can. Don't worry about the hook or the coils where the neck was twisted together. Bend the wire in the middle, to match the curve at the end of your crocheted chainsaw blade.
Take up the crocheted blade again. Ch 1, turn.
Hold the wire frame and crochet together, and crochet over the wire. (Figure 3)
Row 4: Sc in 1st st, * picot, sc in next 2 sts, repeat from * around. Bind off. Weave end in.
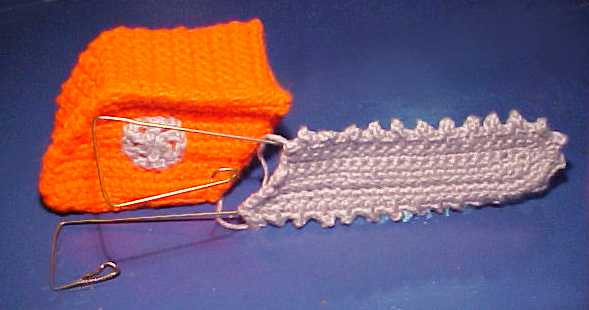
Figure 4
Carin Huber (photo)
click image to enlarge
Cut the hook off of the hanger with the wire cutters. Using the engine case as a guide, bend the bare wire with the pliers as shown in figure 4. Use the pliers to curl the ends of the wire into loops toward the inside of the structure, so there won't be ends that could poke out. Make these loops as small as you can, as you will have to force them through the fabric of the engine case.
Attaching the Blade to the Engine Case:
Work the looped wire ends into the front of the engine case, the top wire one row down from the top of the case, and the bottom wire one Row up from the bottom of the case, in the middle of the rows. Slide the case along the wires, until the back of the blade meets the case. Sew the blade to the case with Light Gray yarn. Make any necessary adjustments to the wire to make it fit well inside the case, without poking out or stretching the case.
Grips:
Make 2, in Black.
Make a magic ring. Ch 1, 8 sc into ring. Pull ring tight. Sc in first st. (Do not join, do not ch1.) Continue to sc in each st, in a spiral fashion, until you have a tube about 8 inches long. Lightly stuff. (If you stuff the tube too firmly, the fiberfill will stretch the stitches and show through the outside of the piece. If this happens, remove the fiberfill, then squeeze and work the crochet with your hands until it compacts again. Then re-stuff.) Sc 2 tog, 4 times. Bind off.
Attaching Grips to Engine Case:
Bend black tubes into a "u" shape. Position on engine case as shown in project photo, and sew firmly with Black yarn.
Finishing
Lightly stuff the engine case until plump, but not round. Whipstitch the opening closed with Vibrant Orange yarn.
About
contact Carin:
• legal info
![]()
home • antifesto • this issue • archive • submit • errata • masthead • contact us • legal