

 |
 |
 |
 |
 |
 |
 |
 |
wa na na na na na na na bat shawl! > alia > parlor round >
fuck off, i'm trying to read > run away! > algormortis >
baba yaga > bonjour, nazar boncugu > impaler
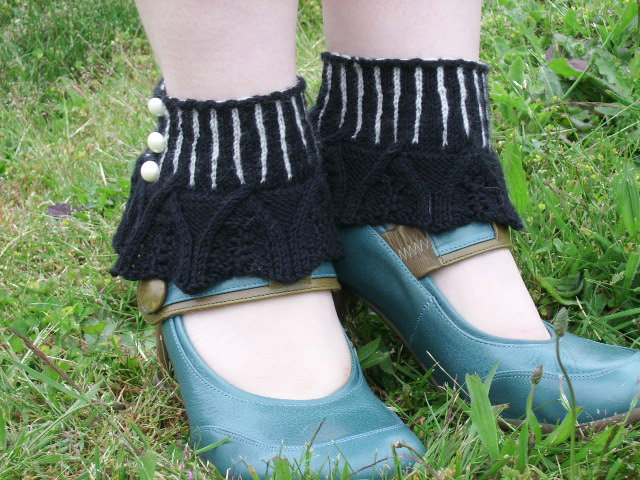
Abe Olson (photo)
Angela Boyle (model)
click to enlarge
April showers bring May flowers, but snow will kill them all.
Keep your ankles warm this spring and well into the fall.
Suggested Listening
The Violin Player by Vanessa-Mae
Difficulty
Strong Intermediate
Click here for definitions of difficulty levels.
Finished Measurements
Size M, (S, L): 9/22.9cm (8/20.3cm, 10/25.4cm) long and ~4/10.2cm wide
Download
All charts for Alia (pdf format)
Materials
- Debbie Bliss baby cashmerino [55% merino wool, 33% microfiber, 12% cashmere; 137yd/125m per 1.75 oz/50g skein] color #300/black, 1 skein (MC)
- Debbie Bliss baby cashmerino [55% merino wool, 33% microfiber, 12% cashmere; 137yd/125m per 1.75 oz/50g skein] color# 012/light gray, 1 skein (CC)
- US 2/2.75mm knitting needles
- Cable needle
- Scissors
- Tapestry needle
- 6 pearly buttons (preferably the kind with a shank or peg on the back)
- Needle and thread
Gauge
30 st per 4"/10cm and 36 rows per 4"/10cm in stockinette stitch.
Design Notes
You will need less than half a skin of the light grey and a less than three-quarters of a skein of black.
Read the pattern through once before attempting. Then read it again.
The directions for this pattern are written for size medium. The changes for small and large are given in parentheses.
Special stitch
Llinc (pronounced "La-Link") left-leaning increase: Knit the stitch. Lift up and place the left leg of the stitch below the one you just knitted onto the left-hand needle, ktbl.
Cat Bordhi has a very helpful (and amusing) Llinc video tutorial on YouTube, which also covers Lrinc, a right-leaning increase not used in this pattern.
Work the button holes and increases at the same time as these instructions. Reminders are included. (Instructions for Button Holes and Increases follow this section.)
CO 65, (55, 71) in MC. Work all pinstriping in stockinette stitch.
Row 1 & 2: Work 2 MC, *1 CC, 2 MC, repeat from * to the end. That is 21, (19, 23) repeats.
Row 3 (RS) Continue in pattern, remembering to place a button hole per instuctions below.
Row 4 - 8: Continue in pattern to the end of each row.
Row 9: Follow the Increase Chart for Row 9 (also see Increase Shaping instructions below).
Row 10: Continue in pattern to the end of each row.
Row 11 (RS) Continue in pattern, remembering to place a button hole per instructions below.
Row 12: Continue in pattern to the end of the row.
Row 13: Follow the Increase Chart for Row 13 (also see Increase Shaping instructions below).
Row 14 - 16: Continue in pattern to the end of each row.
Row 17 (RS), (the last pinstripe row) Remember to place a button hole per instructions below and follow the Increase Chart for Row 17 (also see Increase Shaping instructions below).
Button Holes
At RS rows 3, 11, and 17 (the last pinstripe row), start the row with k2tog, yo and continue in pattern.
For the second ankle wrap, k the buttonhole rows (3, 11, and 17) in pattern to the last 2 st, yo, k2tog.
Increase Shaping
Work the Increase Shaping Chart on the following rows:
Row 9: (RS), work the first row of increases.
Row 13: (RS), work the second row of increases.
Row 17: (RS), work the third row of increases.
All increases are done in MC sections.
To increase from 2 st to 3 st: k1, LLinc, k1.
To increase from 3 to 4 st: k2, LLinc, k1.
Arched Lace
Rows 18 - 20: Work three rows Stst ending WS.
Row21: K3, (1, 3), *work row 1 of the Arched Lace Chart, p1, (0, 1)* 7 times (6, 8 times) total to 3, (1, 4) st before the end. K3, (1, 4) st.
Rows 22 - 31: Repeat, working up the Arched Lace Chart until you have completed it.
Rows 32 - 36: Then work rows 10 and 11 of the Arched Lace Chart two more times. Work row 10 once more while you bind off loosely.
Finishing
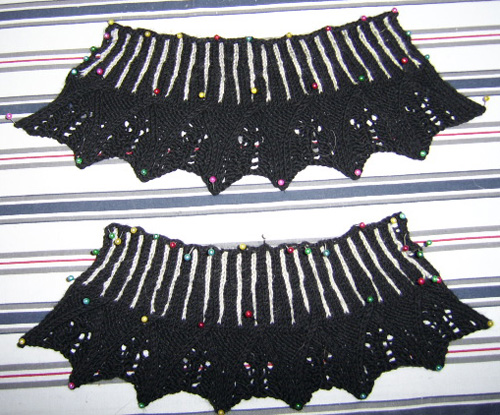
Blocking Alia
Abe Olson (photo)
click image to enlarge
Weave in ends. Block. You can block it so the ends are pointy (like mine) or so the edge is straight.
Sew on the buttons. Put on your best heels and new ankle warmers and go puddle stomping.
About
contact Angela:
• legal info
![]()
home • antifesto • this issue • archive • submit • errata • masthead • contact us • legal