

 |
 |
 |
 |
 |
 |
 |
 |
spider's parlor > charlotte a. cavatica > pumpkin pasties >
black widow > itsy bitsy spider > infestation
Rebekkah Kerner(photo)
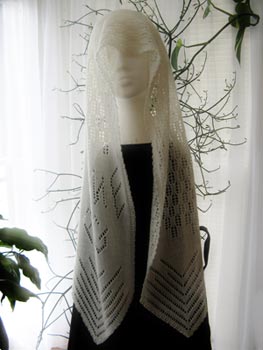
The humble radiant terrific book is now a humble radiant terrific scarf for a new lace knitter to try.
Suggested Reading
Charlotte's Web
by E. B. White
Suggested Listening
"She's Actual Size" (preferably the live version)
by They Might Be Giants
Difficulty
MoonPrincess RavenDark
Click here for definitions of difficulty levels.
Finished Measurements
59.5" L x 9"W
Download
Charlotte's Charts (pdf format)
Materials
- Knit Picks Merino Wool Lace Weight Bare [100%merino wool; 880ys/805m per 3.5oz/100g], 1 skien. (I used just under half of one skein. You should be able to knit this pattern with 440 yards of any laceweight yarn.)
- US 4/3.5mm needles, or size to get gauge
- Darning needle
- Blocking pins
- Stitch markers (optional)
- Blocking wires (optional)
Gauge
28sts x 36 rows = 4"/10cm in stockinette stitch after blocking.
Design Notes
The scarf is knit in two sections and grafted together, so you will cast on twice.
Rebekkah Kerner (photo)
click image to enlarge
Directions
Cast On and Set-up Rows
Cast on 3 stitches.
Row 1: knit 3
2: k1, m1, k1, m1, k1
3: k5
4: k1, m1, k3, m1, k1
5: k7
6: k1, m1, k5, m1, k1
7: k9
8: k1, m1, k7, m1, k1
9: k11
10: k5, yo, k1, yo, k5
11: k5, p3, k5
12: k5, yo, k3, yo, k5
13: k5, p5, k5
14: k5, yo, k5, yo, k5
15: k5, p7, k5
16: k5, yo, k7, yo, k5
17: k5, p9, k5
Rebekkah Kerner (photo)
click image to enlarge
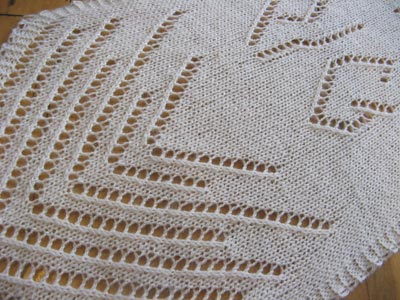
The Web (Chart A):
You are now ready to begin working Chart A. Keep in mind that each row begins and ends with 5 stitches of garter stitch. These stitches are knit on every row, and are not included in the chart. Chart A (and all other charts) include right side rows only. On the wrong side (even numbered) rows, purl across the chart stitches, remembering to knit the 5 garter stitch border stitches on each edge of the scarf. If you have difficulty remembering this, try placing a stitch marker after the first five stitches and before the last five. The visual clue will help.
The last row of Chart A is row 68, which is a purl row. Work row 68, and then work 6 more rows of plain stockinette (alternating rows of knitting and purling), remembering to work the 5 edge stitches on either edge in garter stitch (knitting each row).

Rebekkah Kerner (photo)
click image to enlarge
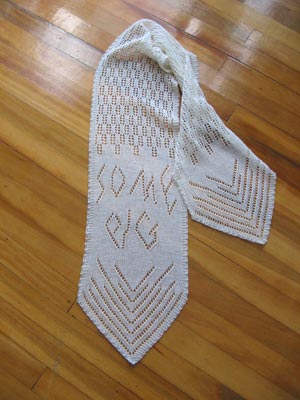
The Writing (Chart B):
Now its time for the pig! Work Chart B, remembering to work the edge stitches (not charted) in garter stitch. As with chart A, every other row (uncharted) is a plain purl row.
The last row of Chart B is row 68, which is a purl row. The next row is a decrease row. To work this decrease row, work the edge garter stitches, k2 togeter, k 27, k2 together, k 25, ssk, work the edge garter stitches (3 stitches decreased). Work 5 more rows in stockinette (ending with a purl row).
The Corpses of Meals Past, aka The Bugs (Charts C and D):
Work Chart C (rows 1-8) once, remembering to keep the garter edges (uncharted) intact. Keep in mind that the even numbered (wrong side) rows are not charted for any of the charts. These rows are purled. The pattern repeat for Chart C is 12 stitches, with the remaining 7 stitches worked at the end of the row.
Work Chart D (rows 1-16) 15 times, remembering to keep the garter edges (uncharted) intact. Keep in mind that the even numbered (wrong side) rows are not charted for any of the charts. These rows are purled. The pattern repeat for chart D is the center 6 stitches in the chart. Work the first 3 stitches, repeat the middle 6 stitches to 4 stitches before the end of the row, and then work the last 4 stitches of the chart.

Rebekkah Kerner (photo)
click image to enlarge
Work rows 1-8 of Chart D once more.
Work Chart C (rows 1-8) again.
Work 2 more rows of stockinette, remembering to keep edge stitches in garter stitch.
The Other End:
Work the other triangular web scarf-end by following the instructions for the cast on and setup rows, and Chart A. Remember to follow the directions for the stockinette rows that follow chart A. During one of the knit rows following chart A, decrease 3 stitches as follows: work the edge garter stitches, k2 togeter, k 27, k2 together, k 25, ssk, work the edge garter stitches.
When you have completed this second end section, graft it to the rest of the scarf using Kitchener stitch following the directions below.
Kitchener Stitch for Garter Stitch:
Step 1: Bring yarn through the first stitch on the front needle purlwise, leaving the stitch on the needle.
Step 2: Bring yarn through the first stitch on the back needle purlwise, leaving the stitch on the needle.
Step 3: Front needle: Bring the yarn through the first stitch knitwise, removing that stitch from the needle. Then bring the yarn through the next stitch on the needle purlwise, leaving that stitch on the needle.
Step 4: Back needle: Bring the yarn through the first stitch knitwise, removing that stitch from the needle. Then bring the yarn through the next stitch on the needle purlwise, leaving that stitch on the needle.
Note that in kitchener stitch for garter stitch, the instructions are the same for the front and back needle. Be careful to move the yarn between needles such that it doesnt string across the right side of the work.
Repeat steps 3 and 4 until you have grafted the first garter edge stiches. Continue on, grafting the stockinette section stitches together, altering step 4 as follows:
Back needle: Bring the yarn through the first stitch purlwise, removing that stitch from the needle. Then bring the yarn through the next stitch on the needle knitwise, leaving that stitch on the needle.
When you reach the other garter edge, revert back to the original instructions for step 4.
If some photos would help, check out Wooly Wormhead's Kichener Close-Up.
Finishing:
Completely immerse the scarf in room temperature or lukewarm water for half an hour. (Use a non-rinse wool wash, if you wish.) Gently remove the scarf from the water, making sure its fully support, and gently squeeze (dont wring!) out as much excess water as you can. Wrap the scarf in an absorbent towel to remove more water. (You may want to put the towel/scarf cocoon on the floor and stand on it, to aid in the squishing.) Block the scarf, using blocking wires or string to help get straight edges. I blocked my scarf to about 66 in length and 10 in width, and found that it shrunk about 10% in each direction after blocking, to ~60 and 9.
Weave in ends and wear with gusto.
About
contact Rebekkah • http://bowerbirdknits.blogspot.com/ • legal info
![]()
home • antifesto • this issue • archive • submit • errata • masthead • contact us • legal